

How To Take Picture Of Waterfalls With Point-and-shoot Camera
If you are looking for a new way to better your photography no matter your genre, try shooting waterfalls. Here is everything you demand to know to photo waterfalls like a pro and have fun while doing it.
How to Photograph Waterfalls – Camera Settings
Shoot in Manual
If you are already comfortable with shooting in manual mode, and so this is where you should commencement following the advice below. If you oasis't yet gotten acquainted with manual mode, then waterfall photography is a great opportunity to start learning it! The cool affair about shooting waterfalls is that while you are attempting to capture motion (which tin be stressful in some situations) the bailiwick continues to motility indefinitely. Super handy. Information technology'due south pretty improbable that you will miss the shot, unlike in sports photography or other types of photography where the moment could be gone in an instant. Waterfalls are very forgiving subjects, and yous can have your time getting to know your manual settings and get a stunning waterfall photo to kick.
If y'all are Really uncomfortable with shooting in manual mode, don't fret. Start past shooting in shutter priority fashion. Yous will get used to adjusting the shutter speed and will get a sense of how time with the shutter open correlates with how much move in the water y'all volition capture to get the look yous want.
Here'due south the catch: when you shoot in shutter priority, you lot cull the shutter speed and ISO settings, and the photographic camera chooses the aperture setting to become the right exposure. If you accept a low-light situation, it is possible that the camera will set up the discontinuity wide open up, which will reduce the depth of field. If y'all have any foreground elements, so they (or the waterfall, depending on where your focus point is) might exist out of focus. All the more reason to play around in transmission style and get comfortable controlling all iii exposure triangle settings. However, if everything in the frame is at altitude and can exist focused on at infinity, and so this might be less of a concern.
Shutter Speed: Capturing Motion
The first matter to keep in heed when starting to learn how to photograph waterfalls is that you lot are capturing the movement of water. Some people like the shine, creamy waterfall look that is pop these days, and others prefer the more frozen-in-fourth dimension wait. To convey more or less motion in your photo, you should think well-nigh shutter speed first, and then make up one's mind your exposure triangle settings from there.
Of class, in addition to whether you lot are trying to capture the motility of the h2o or freeze it in fourth dimension, the speed and volume of the h2o will also dictate what shutter speed to use, and then keep that in heed. Employ longer shutter speeds to become that creamy waterfall look and utilise shorter shutter speeds to see more definition in the water. Generally speaking, shutter speeds of well-nigh 1/6 2nd to several seconds will give you that silky water appearance. Information technology is all-time to accept a few test shots and suit the shutter speed according to the story you are trying to convey in your photograph.
ISO Sensitivity
Showtime off setting your DSLR at the everyman ISO (commonly ISO 100) setting it has. ISO sensitivity is the camera sensor's power to capture light transmitted through the discontinuity opening and the shutter opening and endmost. College ISO settings result in more than dissonance in the photograph because they increase the sensitivity of the sensor to the light that is being transmitted. Today, photographic camera sensor technology is advanced enough that high ISO noise is less of an event than information technology used to be. That said, depression ISO settings volition give you a higher quality photo, then it is a good rule of pollex to use the lowest ISO you can to get the exposure you want.
Aperture: Depth of Field
The limerick yous accept in mind volition decide what aperture you should apply. Besides controlling how much light hits the sensor, aperture controls depth of field, which is an important consideration in composition. For case, if you institute a great foreground element to include in your shot, such as some nearby rocks at the bottom of the waterfall, then you will want to get for a long depth of field or a higher f-cease number (>f/16) to effort to get everything in focus. If you want to maximize the depth of field so that you can go really close to a foreground chemical element and have the entire shot in focus, then consider learning a how to do epitome stacking to combine multiple shots with different focal points into one. If you want to blur out part of your image for a certain issue, then use a shallow depth of field, or a lower f-end number (<f/8).
Camera Gear Essentials for Waterfall Photography
Here is a list of essential equipment to photograph waterfalls like a pro:
- DSLR camera
- Wide angle and/or telephoto lens
- Tripod
- Filters
- Shutter Release
DSLR Camera
Whatsoever DSLR that allows you to control the shutter speed and (ideally) shoot in transmission manner will enable you to take stellar waterfall photos. I recommend shooting in RAW format considering this will give you the most data to work with in post-processing of your image.
Lenses
As yous learn how to shoot waterfalls, it is fun to endeavor unlike focal lengths to get different furnishings. About oftentimes, a broad-angle lens (16-35mm) is used to include a absurd foreground and/or to frame the entire waterfall. I remember it is fun to bring along a telephoto lens (24-70mm or 70-200mm) to experiment with a capturing a more intimate look of a section of the waterfall. This works especially well on cascading waterfalls. A telephoto is too handy if you can't get correct up near the waterfall and need to shrink the scene.

Tripod
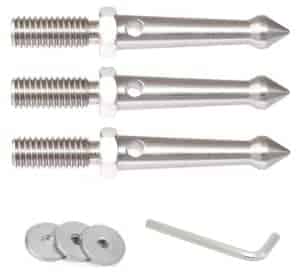
Because waterfall photography ofttimes involves using longer shutter speeds, it is almost impossible to shoot waterfalls without a tripod. Even with the all-time vibration reduction or optical stabilization technology that your lens may take, you will be disappointed with handheld shots. Whatever sturdy tripod that will go on your photographic camera rubber and steady in or near the water current will practice. If you are looking to upgrade from your first tripod, check out this Improve Photography commodity on things to consider when choosing a tripod. Since you lot will be shooting nearly h2o, it is highly likely that you will encounter some slippery conditions, and spikes on the anxiety of your tripod can help prevent accidental slippage.
When you are working on a tripod, it's easy to get locked into place and not walk around and try different angles. Exist sure to keep exploring a location and take fun experimenting with different angles, depths of field, and settings. Sometimes, it helps to scout the surface area first and accept some shots with your smartphone before getting your tripod and camera gear up up.
Don't forget to clean your tripod after exposing it to h2o, sand, grit, etc. Cheque out Brent Bergherm's awesome video available on Improve Photography Plus on how to properly clean your tripod.
Filters
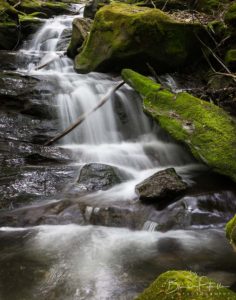
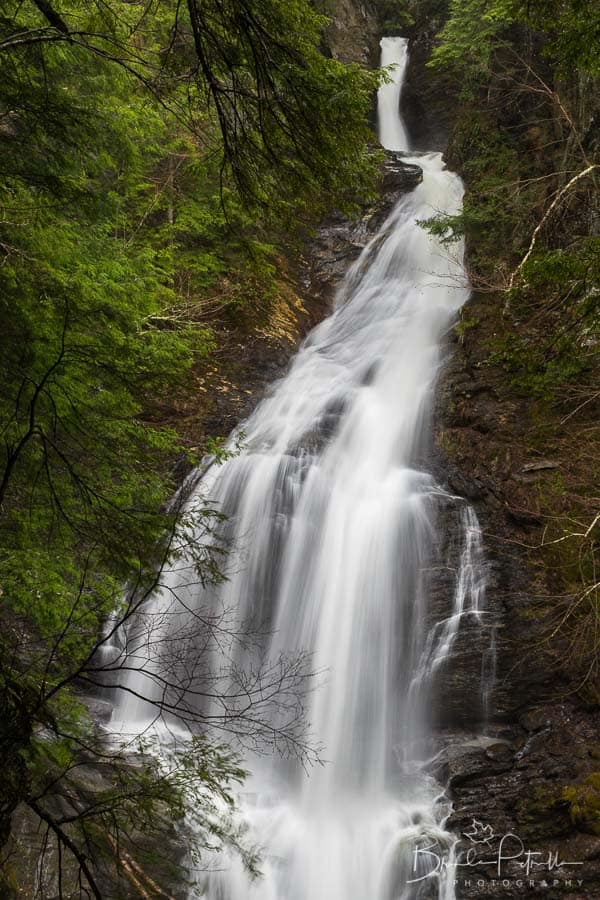
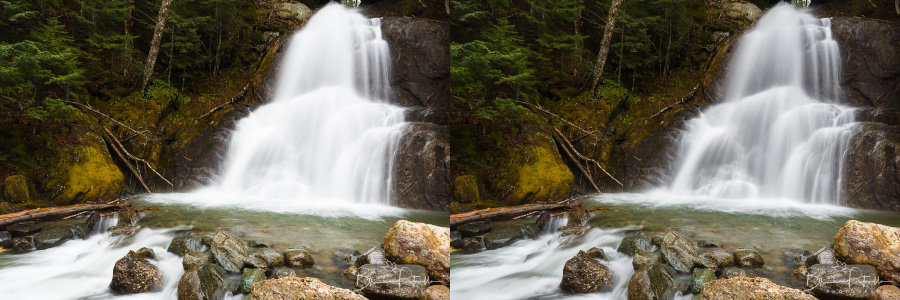
While some might argue that using filters is not absolutely essential to waterfall photography, if you are going for the silky, svelte, moody look of waterfalls, then they are a must. If you don't already have a gear up of filters for landscape photography, the first filter I would purchase is a circular polarizer. A polarizer filter works to cut down on glare, very similarly to polarized sunglasses. Compare the two photos beneath to see how a polarizing filter reduces glare on the rocks and on the water. Additionally, past reducing glare the water can appear clearer and underwater rocks or other elements may go more visible, which often makes for a more interesting composition.

Another reward of polarizers is that they reduce exposure past about i-2 stops, thereby allowing you to tedious downwardly the shutter speed and record more of the water's movement. Sometimes, this is all you lot need to get that silky smooth expect of the water.
Nevertheless, if you are shooting on a bright day and are already at your lowest ISO setting and/or if the h2o current is such that you need to tedious your shutter speed downwardly even further, then the side by side filter y'all need is a neutral density (ND) filter. ND filters are basically dark drinking glass of varying levels of darkness that work to reduce light from hitting your camera sensor. They are called "neutral" because they cake all wavelengths of calorie-free without altering colour. ND filters are available in a range of densities that block a sure number of stops of exposure. For more details on ND filters, check out the Improve Photography article "ND Filters 101: 8 Things Yous Need to Know".
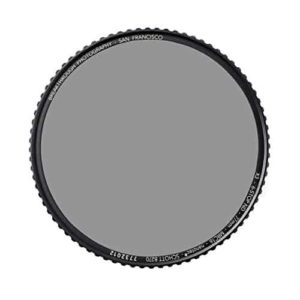
The ND filters that I use most often for waterfall photography are the 3-terminate and half dozen-stop ND filters. Very rarely do I bust out the 10-finish ND filter, but it is fun to have on paw if you can fit it into the budget. I am a big fan of Quantum Photography filters, and I highly recommend their 3-end, vi-stop, and 10-finish ND filters for waterfall photography.
When purchasing filters, be sure to chose the correct thread size for the lens(es) yous plan to use. Check out Improve Photography's article "Lens Filters: Which Filters exercise Photographers Really Need" to get more info on these and other filters.
Shutter Release
Equally I mentioned to a higher place, waterfalls are excellent subjects on which to hone your skills in capturing motion in your photography because they are constantly moving, and the "moment" isn't lost earlier you lot've dialed in your settings. That said, the water is constantly moving and changing and so no two waterfall shots will be exactly alike. I recommend taking several sequent shots for each setting and limerick so that you tin can pick your favorite capture of the water during mail service-processing. The easiest mode to do this is to utilize a shutter release cablevision or remote and set your camera to continuous shooting fashion. This way you won't inadvertently innovate camera shake while holding downwards the shutter button on your camera.
Don't Be Afraid…
To Get Your Feet Wet – literally, that is, not but to try something new. Yous will detect that some of the best shots are taken from existence right in the water with the waterfall or stream. It's a great fashion to shoot low and include foreground elements, like river stones under the water (that you can see with your polarizing filter), a mossy log, a colorful leaf, or what have you.
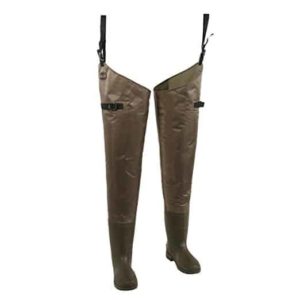
Earlier you accept the plunge, though, be sure to have proper footwear to protect your feet. If you lot are shooting in warmer temperatures, river sandals, old sneakers, or water shoes are fine for protecting your feet from abrupt rocks, sticks, and the like. Remember that rocks under the water are oft slippery, and then take your time getting into place. If the water is fairly deep or cold, then I recommend investing in a pair of hip waders. You won't exist winning any fashion contests, but they volition go on you dry (if yous don't go in too deep), and you can wear warm socks with them. Speaking of socks, if you're annihilation similar me and become cold feet no matter what the temperature, then I recommend wearing some neoprene socks, such as the NRS Purlieus Sock.
Finally, if you are photographing waterfalls in colder temperatures, so you are likely to come across ice. And if yous call back water ice is slippery, try walking on wet water ice. Under these atmospheric condition, I always pack a pair of Kahtoola Microspikes, which I notice to be more effective than other over-the-boot traction cleats and less cumbersome than crampons.
Protect Your Gear
Undoubtedly, your camera gear is going to get wet when you lot photograph waterfalls. Hopefully, not submersion level of wet, merely the mist from waterfalls tends to build up on the surface of your camera lens, and then you lot will need to make clean it frequently. I recommend using your lens hood to help proceed mist off the lens, and keep the lens cap on until you are ready to outset composing the picture. Once you lot accept your composition set, check the lens and wipe it clean with a microfiber cloth and/or lens cloth depending on how moist it is. If the waterfall is giving off a lot of spray, you should check your lens between shots. I've definitely slacked on this before and have come up home disappointed to find out that my photos were all a chip smudged. Boo.
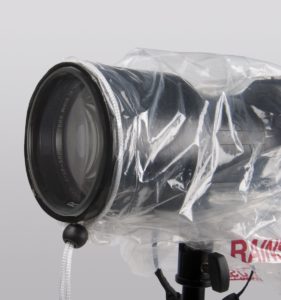
You should protect your camera body equally well, fifty-fifty if you lot take a atmospheric condition sealed body. It's just good practise. I use this rain sleeve, which is super economical and cinches down effectually your lens hood, providing a squeamish niggling rain coat for your photographic camera and tripod head. If you are working in more extreme conditions, and so it may exist a good idea to have extra protection for your camera, such as with the Peak Design Shell Comprehend.
Other Tips and Tricks for Shooting the All-time Waterfall Photo
Weather condition and Calorie-free Make a Difference
- The best time to photograph waterfalls is on a cloudy day. Clouds essentially work every bit a giant soft box in the sky and cut back on the harsh contrast of highlights and shadows on the h2o. It is very difficult to properly betrayal for a waterfall if part of it is in vivid sunlight and part of it is in the shadows. It is still possible to shoot on a sunny day, especially if you use ND filters, but try to wait until there is even light striking the waterfall.
- Another great time to photograph waterfalls is during (or merely after) a rainy day. Rain tends to bring out the vibrancy of colors in nature and a polarizing filter volition just further this effect.
- Having problem exposing for your waterfall? Consider leaving the sky out of the frame and/or using a graduated ND filter to reduce the effulgence of the sky.
- Be mindful of windy days. Considering slow shutter speeds are used with waterfall photography, it is very easy to get blurred tree branches in your shot on a windy day. If yous aren't able to betrayal for the waterfall AND likewise freeze flapping leaves in the aforementioned shot, then take multiple shots at different shutter speeds and alloy them later on in Photoshop.
Shoot in Landscape and Portrait Format
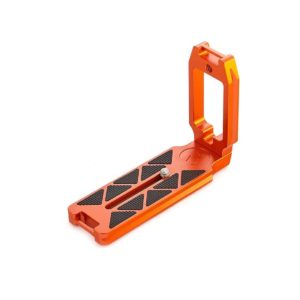
Don't forget to play around with shooting in landscape and portrait layouts. It tin be a pain to constantly adapt your tripod to accommodate switching between landscape and portrait modes, and so I highly recommend investing in an 50-bracket, which will easily adhere your camera to your tripod in either format. You lot will be glad y'all did. It volition save a lot of time and dabble frustration.
Some L-brackets are fairly expensive only definitely worth the investment in terms of getting the correct fit for your camera so that information technology is properly secured on your tripod. This is super important when shooting well-nigh or in water. Although more than affordable, many folks recommend against universal Fifty-brackets because they are not a custom fit to your camera. I've been using the universal L-bracket from 3 Legged Thing for my Nikon D810 and Nikon D5500 and have had zip problems. It is more affordable than many of the custom fit Fifty-brackets, and then I decided to requite it a try. No regrets so far! It as well includes a neck strap zipper on either end, to which I hands attach Peak Design'due south ballast connectors. Very handy, indeed. It's up to you lot to decide what your condolement level is with the potential risk and cost of using a universal versus custom 50-bracket.
Camera Strap
It may seem counter-intuitive to recommend using a camera strap while shooting with your camera on a tripod, only I've found that it puts my mind at ease to have a lightweight strap around my wrist when I'one thousand positioned precariously in or effectually water, just in case things accept a dive (hopefully, not me or my camera). For some, the strap may introduce an extra level of clumsiness, but I've definitely been glad to take had some connection to my photographic camera during those unexpected, slippery moments when you encounter your camera dreadfully heading towards the water. For this purpose, I really like the Peak Blueprint Leash; it is lightweight and unobtrusive.
Lookout Your Highlights
If a waterfall is your primary subject in your limerick, expose for the waterfall rather than for the shadows. The waterfall volition be the brightest chemical element of the photo other than the sky, if you've included it, and you can usually bring up the shadows in post-processing without losing besides much detail. I find it best to slightly underexpose the waterfall and check the histogram. You want to avoid blowing out the highlights in the waterfall, considering you won't exist able to recover that particular in post-processing.
Quick Mail-Processing Tip
Now that you've mastered your camera settings and can navigate moving h2o like a ninja, it's time to post-process those RAW images. Even if y'all've properly exposed for the waterfall and underexposed it a little bit, it may appear blown out on your LCD display or in your post-processing software (this is why the histogram is critical to check). As a general rule of pollex, the first step I take in post-processing waterfalls is to bring the highlights manner down. See the divergence in the two photos below that were candy identically in Lightroom except one has the highlights equally shot and the other has the highlights downwards. More detail in the water tin exist detected with the highlights brought down.
Do Makes Perfect
Discover a waterfall virtually you and visit information technology throughout the twelvemonth. The water levels will likely be different in each season and volition present new challenges in perfecting your waterfall photography. Use the Really Skillful Photo Spots App to find waterfalls in your area or to mail ones that y'all've discovered for others to bank check out.
Bonus Tip!
All of the skills and equipment needed to shoot awesome waterfalls tin be applied to photographing streams and blathering brooks too. Now, go become your feet wet and have some fun! What waterfall photography tips do you lot have? Please share by commenting below.
Source: https://improvephotography.com/49967/a-complete-guide-to-waterfall-photography/
Posted by: hennesseybecomeavoing.blogspot.com
0 Response to "How To Take Picture Of Waterfalls With Point-and-shoot Camera"
Post a Comment